
Have you ever wanted to understand image processing and tried to decided where to start? You haven't?... Well I have 🤓 and I decided that I should start somewhere simple like decoding and encoding Bitmap images (or .bmp file extension) would be a good place to start. Although you may believe that bitmaps just hold RGBA (Red, Green, Blue, Alpha) colour values as a byte each, the file format has a bit more thought put into it.
The original inspiration for this small project was to create a library that I could use in the browser which could act as an input to train a Neural Network for recognizing numbers in the browser, but I never got around to the second part. Whoops 🤷! Maybe in the future I'll try and replicate what Apple has done with their new calculator app. I may have missed the boat on this one.
Never the less, every project is a learning experience, and AI was never my only goal! I wanted to follow a the documented spec and have an end result that would allow me to read and write most types of bitmaps. The resulting library should be tested and deployed as a crate on crates.io. I am happy to report that this was a great success, and I like to think the results speak for themselves.
.bmp images🫠 ...maybe because they are old and not a good use of space, who could have predicted that. All images have been converted to .jpg for your viewing pleasure.All of this was generated with a small sample of Rust code.
use rustbitmap::{BitMap, Rgba};

fn main() {
    let red = Rgba::rgb(255, 0, 0);
    let blue = Rgba::rgb(0, 0, 255);
    let green = Rgba::rgb(0, 255, 0);
    let white = Rgba::rgb(255, 255, 255);
    let pixels = vec![red, blue, green, white];
    let bitmap = BitMap::create(2, 2, pixels).unwrap();

    let mut slow = bitmap.clone();
    slow.slow_resize_to(300, 300); // bicubic

    let mut medium = bitmap.clone();
    medium.resize_to(300, 300); // bilinear

    let mut fast = bitmap.clone();
    fast.fast_resize_to(300, 300); // nearest neighbour

    let mut bitmap = BitMap::new(900, 300);
    bitmap.paste(&slow, 600, 0).unwrap();
    bitmap.paste(&medium, 300, 0).unwrap();
    bitmap.paste(&fast, 0, 0).unwrap();
    bitmap.simplify_and_save_as("merge.bmp").unwrap();
}
If this article is getting to long all ready, you can just checkout the actual code here.
 AlecDivito
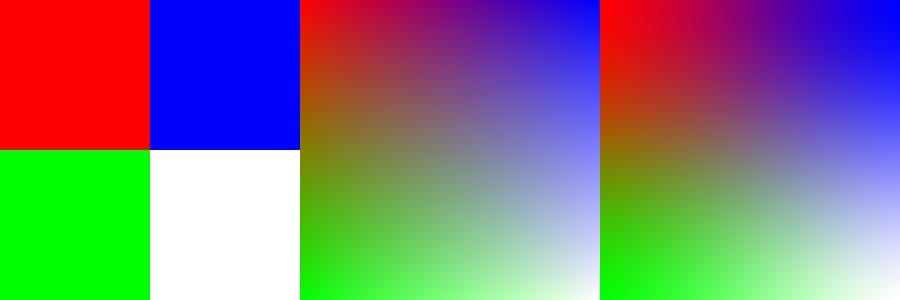
Using just 4 pixels (red, blue, green and white) on a 2x2 pixel image, I am able to use resizing methods to make them into 300x300 pixel images. The different resizing functions can result in 3 different images generated. Those images can then be merged together into one.
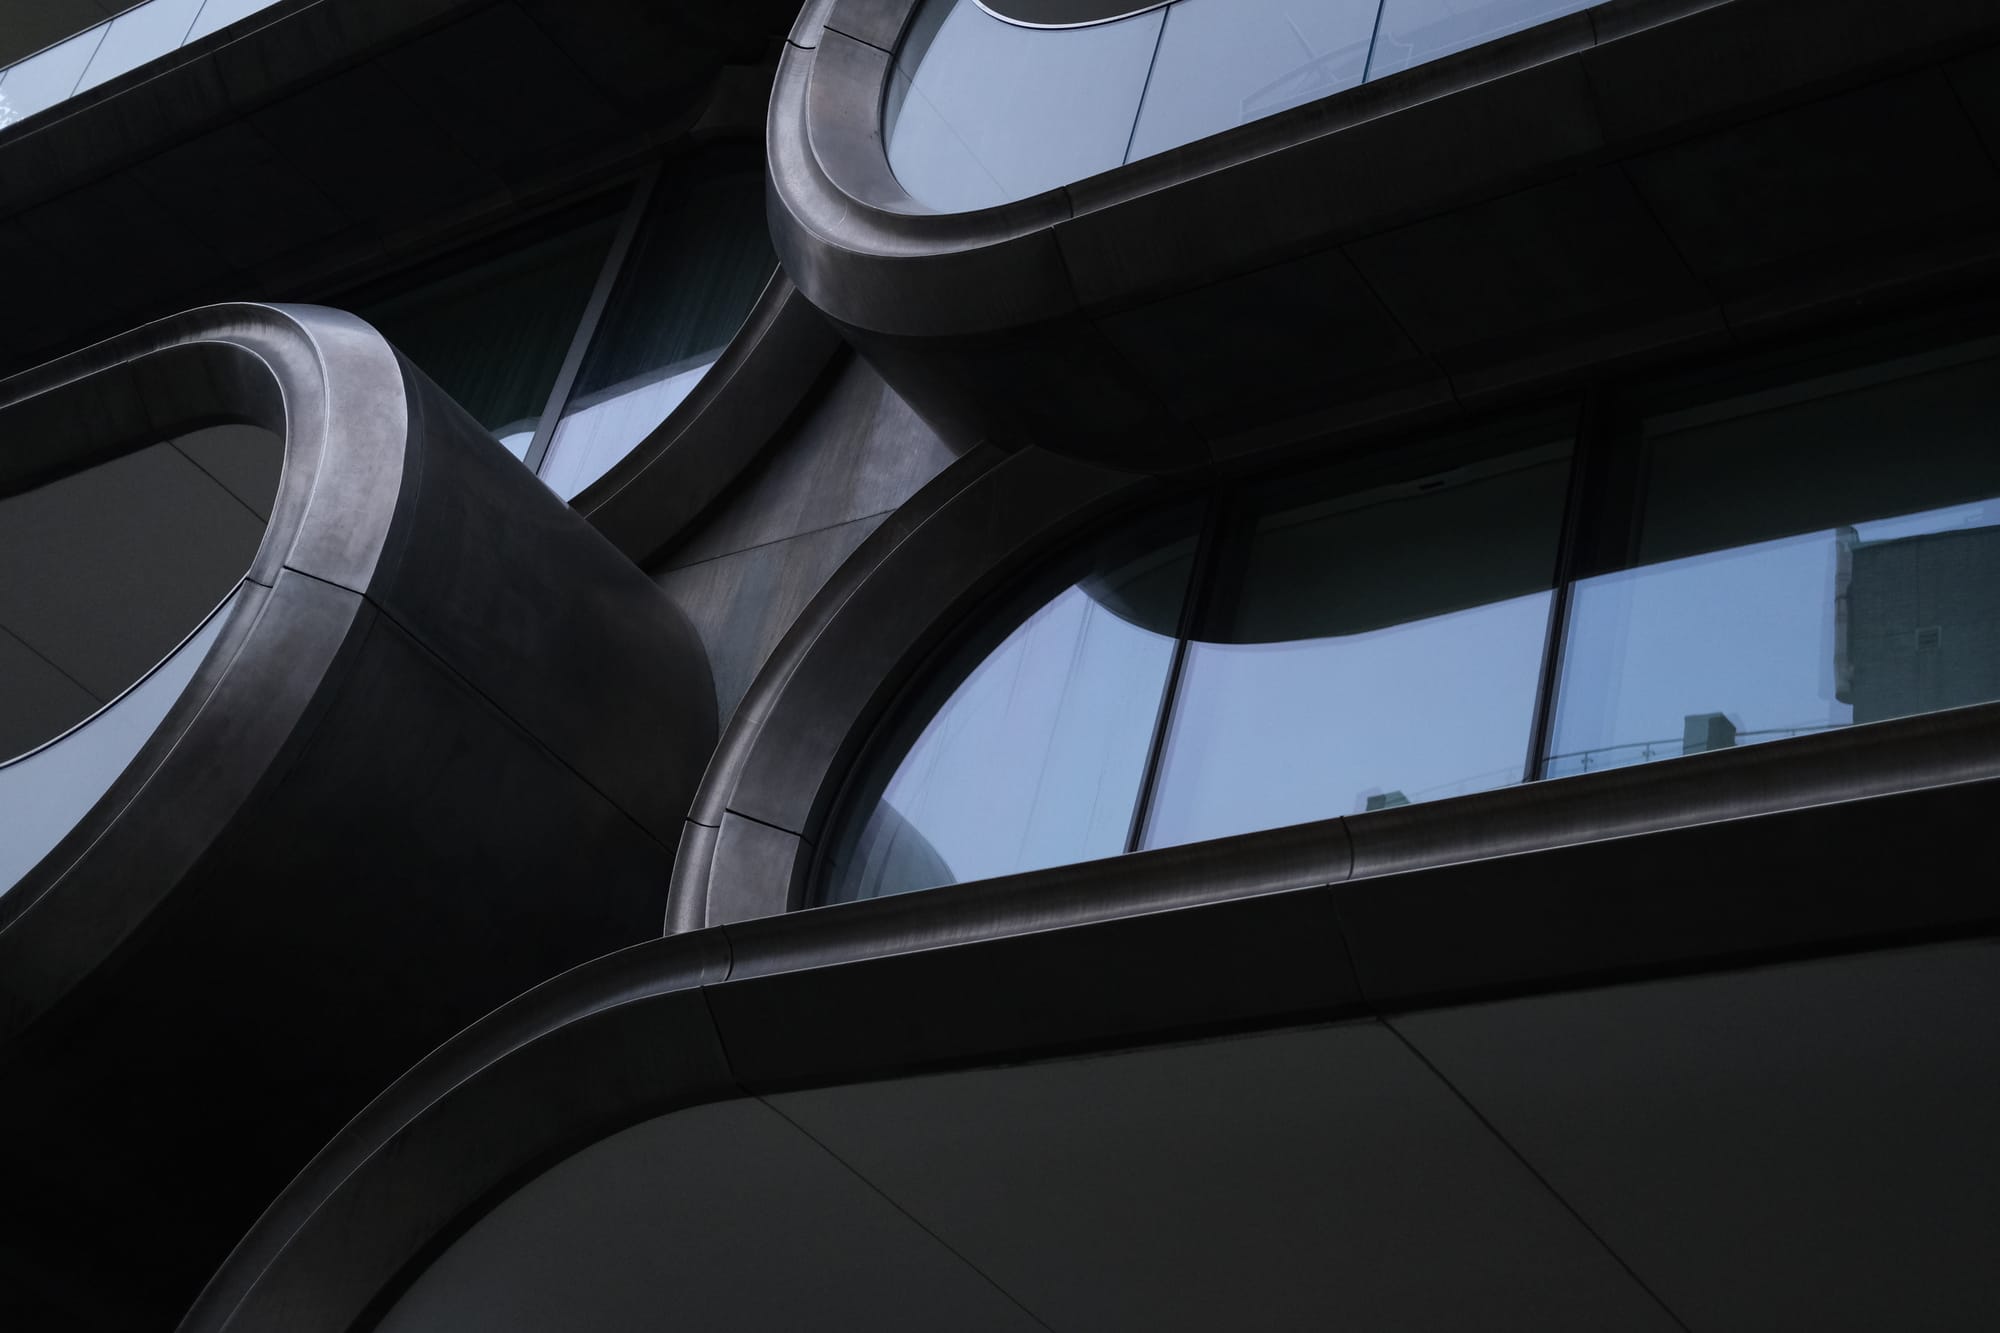
I think it would be pretty interesting to take some real images and resize them, so let's try that. I have this image from a trip to New York of a building, I think it would be cool to read the image in as a bitmap, and then resize 3 different parts into a smaller image.
Let's get started, first, this is the following source image
This time, let's divide the image into 3 and then resize it to a more manageable size so that it contains less data. It's resized in 3 ways
- The first 300 pixels uses nearest neighbour
- The second 300 pixels uses bilinear
- The third 300 pixels uses bicubic
Although the resizing has had trouble on the edges, i think overall it did a decent job resizing everything.
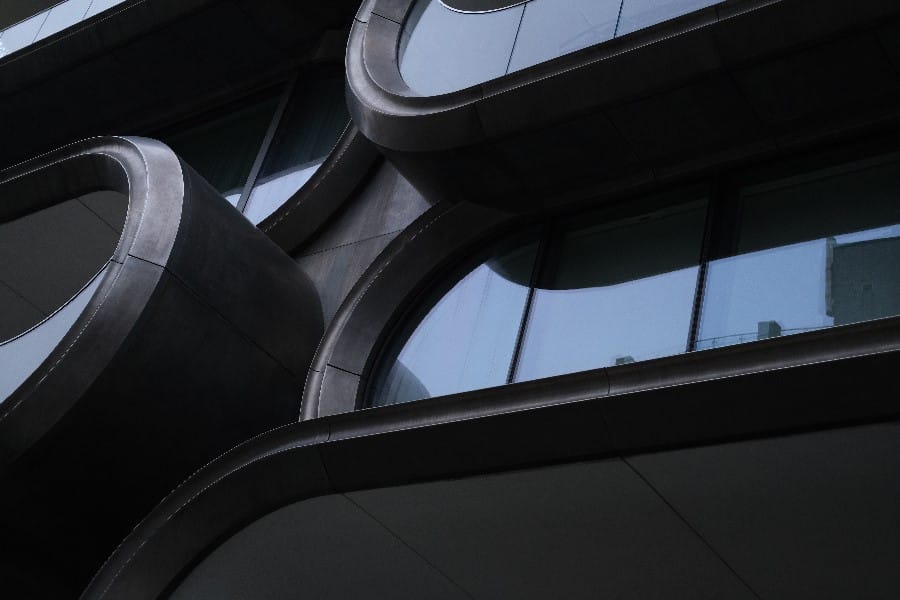
.bmp and re-scaled to 900x600 from 3 different resize.The code that generated this is the following.
use rustbitmap::BitMap;

fn main() {
    let bitmap = BitMap::read("images/building.bmp").unwrap();
    let width = (bitmap.get_width() / 3) - 1;

    let mut img1 = bitmap.crop(0, 0, width, bitmap.get_height()).unwrap();
    let mut img2 = bitmap.crop(width, 0, width * 2, bitmap.get_height()).unwrap();
    let mut img3 = bitmap.crop(width * 2, 0, bitmap.get_width(), bitmap.get_height()).unwrap();

    let (width, hight) = (300, 600);

    img1.fast_resize_to(width, hight);
    img2.resize_to(width, hight);
    img3.slow_resize_to(width, hight);

    let mut bitmap = BitMap::new(width*3, hight);
    bitmap.paste(&img1, 0, 0).unwrap();
    bitmap.paste(&img2, width, 0).unwrap();
    bitmap.paste(&img3, width * 2, 0).unwrap();
    bitmap.simplify_and_save_as("images/image.bmp").unwrap();
}
Enough of the results, I'm sure the reason your here is because you are interested in parsing bitmaps. For that, read on...
Parsing Bitmaps
Not as straight forward as you think
For those that don't know, bitmaps are an image file format that is separated into 4 parts.
- Header Section: Contains a small amount of information on the file like size and a pointer to where the image data is.
- Info Section: Contains the metadata for the image like the width and height of the image and how the colour section should be processed.
- Colour Section: Contains all of the colours used inside of the image. One byte per colour to make up the Red, Green, Blue and Alpha values.
- Data Section: The actual image data.
All of this is helpfully shown in this wonderful image that probably does a better job explaining all of the different fields that are required to process an bitmap image.
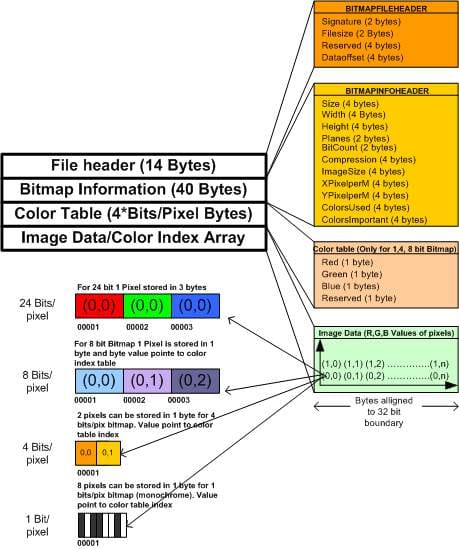
Honestly, the file format is pretty straight forward. Parsing the Header, Info, Colour table and image data section could be implemented in an evening as it's pulling integers from from the file.
The image communicates this very well, by describing that different bit depth results in different data being stored in the file. Valid bit depth are the following:
- 32 Bits (Red, Green, Blue, Alpha)
- 24 Bits (Red, Green, Blue)
- 8 Bits
- 4 Bits
- 1 Bit
When a bit depth is 32 or 24, the image data is normally kept all inside of the image data section, as the possible colours that could exist in the image are above 16.7 million colours. This makes storing the data in the colour table not really worth while. Reading this section for these bit depths is easy because you just need to take the bytes as colour per pixel.
For bit depth of 8, 4 and 1 the bytes act as pointer into the colour table. To determine the colour of these bytes, you'll need to read them from there. The position of each byte is where the pixel should be.
Complications
The biggest issue you'll probably run into if you do this yourself, isn't reading images, but writing them back to disk. This mainly is because of the bit depth. When writing the image to disk, each pixel row must be a width that is divisible by 4. This means you may need to write null bytes to the end of the row. It's an easy mistake to make (I made it 🫠) so it's something to look out for.
Difficulties
I encountered other issues when working on this. But they were mainly features and not so much reading or writing bitmap files. Implementing image resizing like bilinear and bicubic was simple on the surface but playing with the correct algorithm to avoid an index out of bounds error was tedious. Although some helpful videos from computerphile on Youtube and some online articles helped me to eventually get to a place where it could be implemented.
Implementing bicubic is really easy to sometimes over or under shoot the possible range of values. This results in overflowing the bit. This particular resizing took a couple of hours to figure out what I was doing incorrectly.
Reflections
Although I never got to live the dream by building my number recognizing AI that could have possibly taken over the world one day, I was able to create a library that taught me how to develop a Rust library and how to publish it. I didn't get to learn about automated versioning, but I was able to do that in later projects.
It was nice that I wrote some tests. It allowed me to revisit the library (to write this article) and make it easier to add new features, 5 years after I released it. I got to implement some continuous integration using Travis CI, though if I were to move it over, I would use Github Actions now.
If i revisit this library for a 3rd time, it would be to make an NPM package by compiling the library into WASM and providing an interface with wasm-bindgen so that I can use it in my nextjs projects.