
The AI apocalypse is coming for our jobs, right? Okay, maybe not quite yet. But the rise of powerful AI models has shifted from a futuristic fantasy to a present-day capability. So what's the best way to slow them down and save your job? Stop giving them all of your damn data and run the models at home.
I'm giving it a try by using Kube-AI: a Kubernetes operator that allows you to self-host models, dynamically scaling them based on demand. It deploys with a user-friendly interface called Open Web UI to make interacting with the models a breeze. Overall, a compelling solution for anyone wanting more control over their data and AI infrastructure.
Best of all, this can all be configured with GitOps. Therefore restoring or duplicating the AI capabilities of a cluster is as easy as using ArgoCD and pointing it at your git repo and boom! You got your AI cluster back. Stop giving your money to Anthropic, Google, OpenAI or Open Router, you can now successfully run those sweet sweet open source models at home.
I already am running this at home, on my i5-13600KF, 64GB DDR5, 1660 Super 6BG GPU server. For example, here is me using a model called Gemma3 with 4 billion parameters that I run on my CPU.
ffmpegAnd that's not all, I can also run models on my GPU, just much smaller. For example, I run llama3.2 1 billion parameter model on my GPU at home. It's a little bit faster than using my CPU, that's for sure!
Join me as I delve into the world of self-hosting AI, sharing the tricks and techniques that make it all… well, enjoyable.
What I've got deployed at home
I've spent a considerable amount of time to get this working at home with my consumer hardware. I only do this for projects I truly love. Projects like Kanidm and Immich. I think that Kube-AI with Open Web UI is also a great experience for AI models, so I wanted to share it. It's a complete solution that works and I do use it occasionally, so I feel it would be good to share how I deploy it.
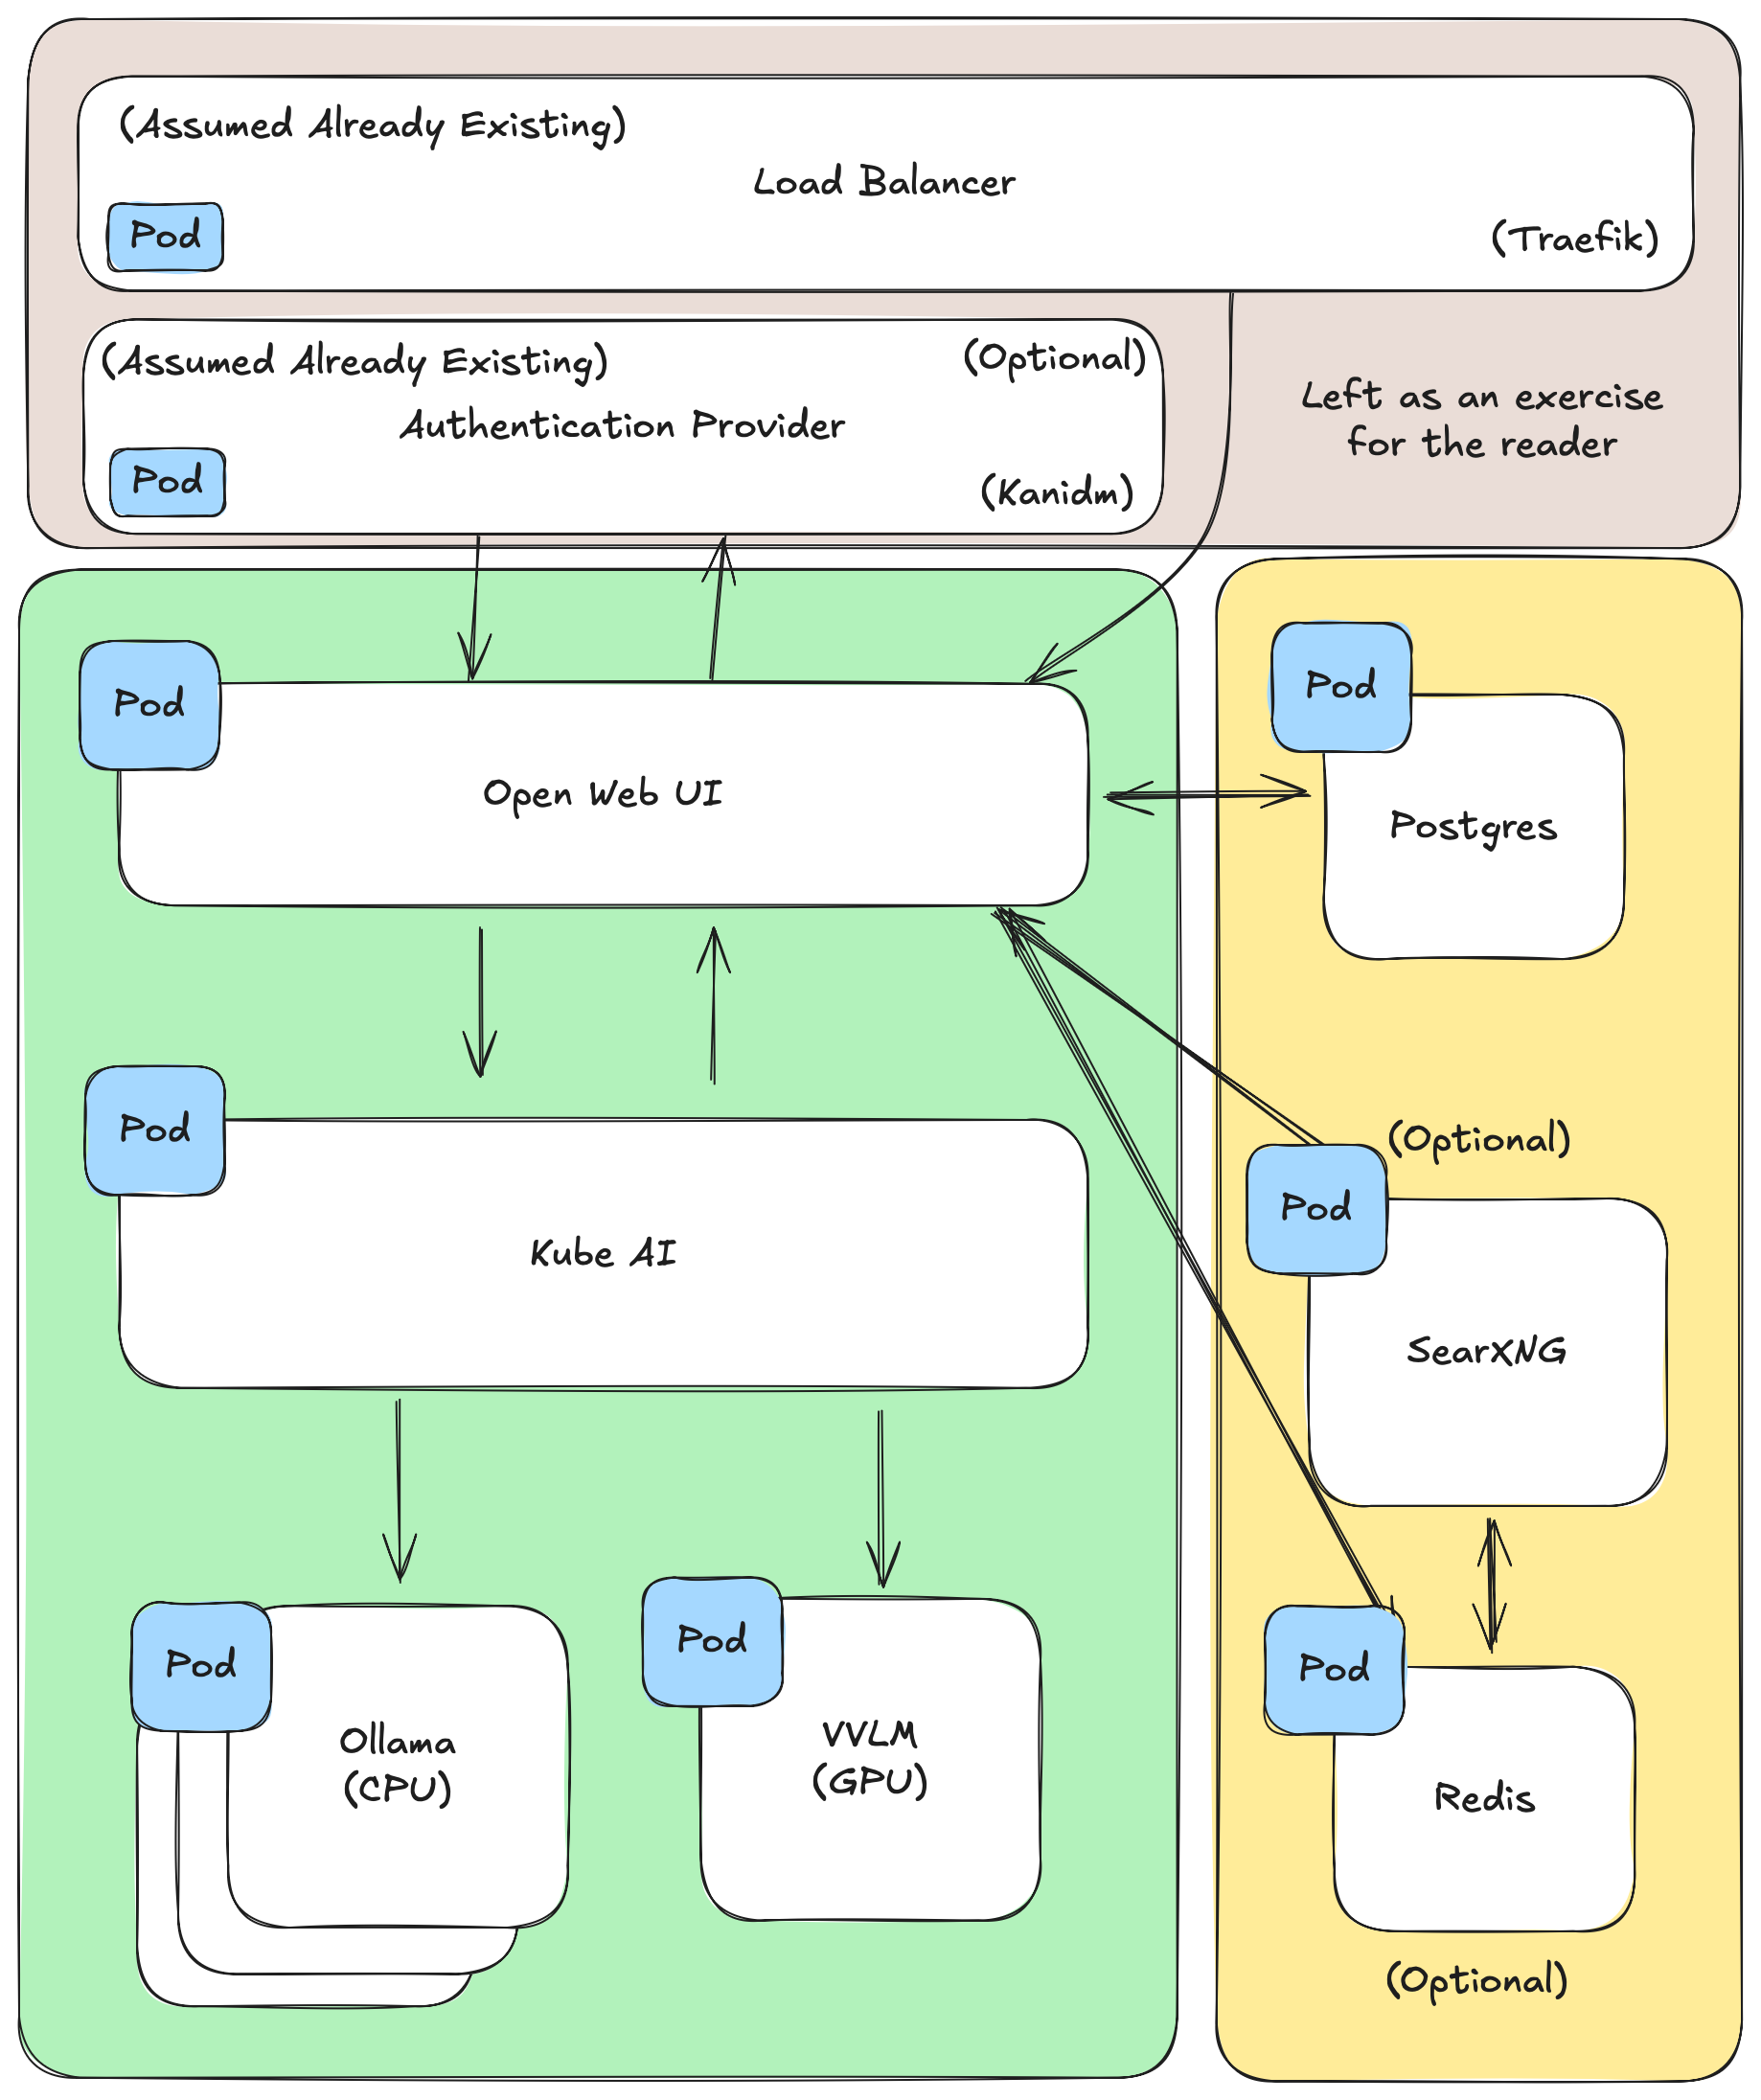
The diagram above shows all of the software that I rely on to host my version of Kube-AI and Open Web UI. As you can see I depend on also hosting my own search engine (SearXNG), Redis (for web sockets), authentication server (for SSO) and Traefik load balancer (for terminating HTTPS requests). For learning purposes you won't need all of these components but if you want to roll a solution like this out for a company, you should consider them.
What you can expect from this article is to give you some yaml that might deploy a bare bones deployment of Kube-AI and Open Web UI. For example, getting SSO working on Open Web UI, spinning up a Postgres database and hosting your own search engine using SearXNG won't be covered. I still expect that you will use the supported documentation to configure the software to work with your setup.
Kube AI
Self host-able Kubernetes Operator for Autoscaling your AI models on your overbuild Home Lab

Kube-AI is an Kubernetes operator that handles managing your open and closed source AI models and deploys them on containers. The containers that run the AI models are based on Ollama or vLLM, but this is configurable. These containers are used for serving many AI models. Ollama is normally recommended to used for CPU based models while vLLM is better to be used for GPU based models.
Models are managed through CRDs (Custom Resource Definitions). They use a simple definition so that you can just point at a model using a URL and let Kube-AI handle downloading and running it in a container on a cluster.
Kube-AI will then act as the interface and load balancer for interacting with the models registered in the cluster.
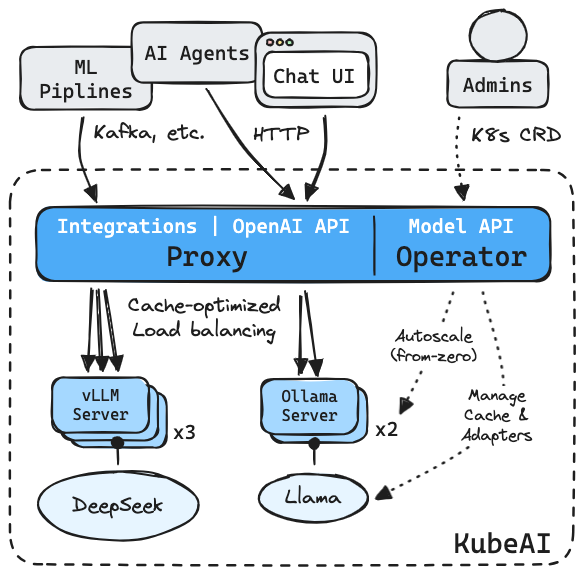
The operator works by allowing an administrator to manually add AI model CRD's to the cluster which can then be used by consumers through the OpenAI API interface that Kube-AI exposes. Depending on the configuration you've setup on, Kube-AI will deploy a number of models to support the given load.
Deploying Kube-AI
I suggest you to use the helm chart provided by Kube-AI, as it provides a nice abstraction for configuring the deployment of the operator. There are two key attributes to configure, resourceProfiles and openwebui.
Resource profiles represent some type of compute that is a requirement to exist on your cluster. You pair the resource profile with an AI model, so that the needed compute that the model expects exists when the pod for the model is created. This is great for when you have many different types of hardware on bare metal clusters, such as different CPU's and GPU's across many machines.
The below is what I've configured.
secrets:
  # Support pulling models from huggingface
  huggingface:
    create: false
    name: hugging-face-token

resourceProfiles:
  cpu-large:
    imageName: "cpu"
    requests:
      cpu: 6
      memory: "42Gi"
  cpu-small:
    imageName: "cpu"
    requests:
        cpu: 2
        memory: 6Gi
  nvidia-1660-super:
    runtimeClassName: nvidia
    imageName: nvidia-1660-super
    limits:
      nvidia.com/gpu: "1"
    requests:
      nvidia.com/gpu: "1"
      cpu: "2"
      memory: "6Gi"
    tolerations:
    - key: nvidia.com/gpu
      operator: Exists
      effect: NoSchedule
In the example above, I’ve created profiles for large and small cpu resources and one for my 1660 Super. These resource profiles can be used when we declare our AI models so that we can match up a given AI model with a given set of compute. These values declared here will be included on the pod that is created to run the AI model once it's spun up.
Kube AI Model CRD
Once we've created some resource profiles for your cluster to use, you can start registering models in your cluster.
apiVersion: kubeai.org/v1
kind: Model
metadata:
  name: gemma3-4b
spec:
  engine: OLlama
  env:
    GIN_MODE: release
    OLLAMA_CONTEXT_LENGTH: "100000"
  features:
  - TextGeneration
  resourceProfile: cpu-large:1
  scaleDownDelaySeconds: 100
  targetRequests: 16
  url: ollama://gemma3:4b
The above is a definition for the gemma3:4b model from Ollama that is using my cpu-large:1 resource configuration (42 GB of RAM, 6 CPUs) and is configured with a 100,000 context length. Though it doesn't need that much compute as it only takes up 12.5GB of memory. The container configured is Ollama and thus we are also pulling models from the Ollama registry.
Declaring a resource for my 1660 Super looks a bit different.
apiVersion: kubeai.org/v1
kind: Model
metadata:
  name: llama3-1b
spec:
  args:
  - --enforce-eager
  - --dtype=half
  - --max_model_len=48000
  - --chat-template=/mnt/chat-template.jinja
  engine: VLLM
  features:
  - TextGeneration
  files:
  - content: |
      {{- bos_token }}
      {{- "<|start_header_id|>system<|end_header_id|>\n\n" }}

      {{- "You are a helpful assistant. You reply directly in natural language" }}
      {{- "<|eot_id|>" }}

      {%- for message in messages %}
          {{- '<|start_header_id|>' + message['role'] + '<|end_header_id|>\n\n' }}
          {%- if message['content'] is string %}
              {{- message['content'] | trim}}
          {%- else %}
              {%- for content in message['content'] %}
                  {%- if content['type'] == 'text' %}
                      {{- content['text'] | trim }}
                  {%- endif %}
              {%- endfor %}
          {%- endif %}
          {{- '<|eot_id|>' }}
      {%- endfor %}
    path: /mnt/chat-template.jinja
  resourceProfile: nvidia-1660-super:1
  scaleDownDelaySeconds: 60
  targetRequests: 32
  url: hf://meta-llama/Llama-3.2-1B-Instruct
In this example, I'm using my nvidia-1660-super resource, which uses the vLLM container. vLLM expects for a chat template to be passed in to bootstrap the start of the conversation. I've created my own very simple one for testing purposes.
Finally, I pass in some custom arguments to support running on an old GPU. Most models won't run on my 1660 Super unless I have --dtype=half and the models use a Tensor type of BF16. If you have a 20xx series and above, you might not have my issues.
Keeping AI models running
When configuring a model, you can decide how it should run. For example you might want to configure it to always run one model with a max of 5. The model should then scale up if the average number of requests are above an average threshold. Finally, when requests to the AI model slow down, it can be configured to wait some time to scale down because loading models from cold start can take some time.
Given the above description, let's take a look at the model CRD below. Here we have a model that always has one replica running using Ollama. If the target requests goes over 5, it will scale up a new model. When the average number of requests go down, it will wait 60 seconds before scaling down the model.
apiVersion: kubeai.org/v1
kind: Model
metadata:
  name: deepcoder-1-5b
spec:
  engine: OLlama
  env:
    GIN_MODE: release
    OLLAMA_CONTEXT_LENGTH: "64000"
  features: [TextGeneration]
  resourceProfile: cpu-small:1
  minReplicas: 1
  maxReplicas: 5
  scaleDownDelaySeconds: 60
  targetRequests: 5
  url: ollama://deepcoder:1.5b
The average requests are calculated on a schedule that is configured on the operator's helm chart during deployment. The autoscaling capability will use these values to determine when to calculate if a model should scale down.
Below is an example where every 30 seconds, Kube-AI will re-evaluate if a model should scale down, given a 3 minute time window.
modelAutoscaling:
  # Interval that the autoscaler will scrape model server metrics.
  # and calculate the desired number of replicas.
  interval: 30s
  # Time window the autoscaling algorithm will consider when calculating
  # the desired number of replicas.
  timeWindow: 3m
Model Performance
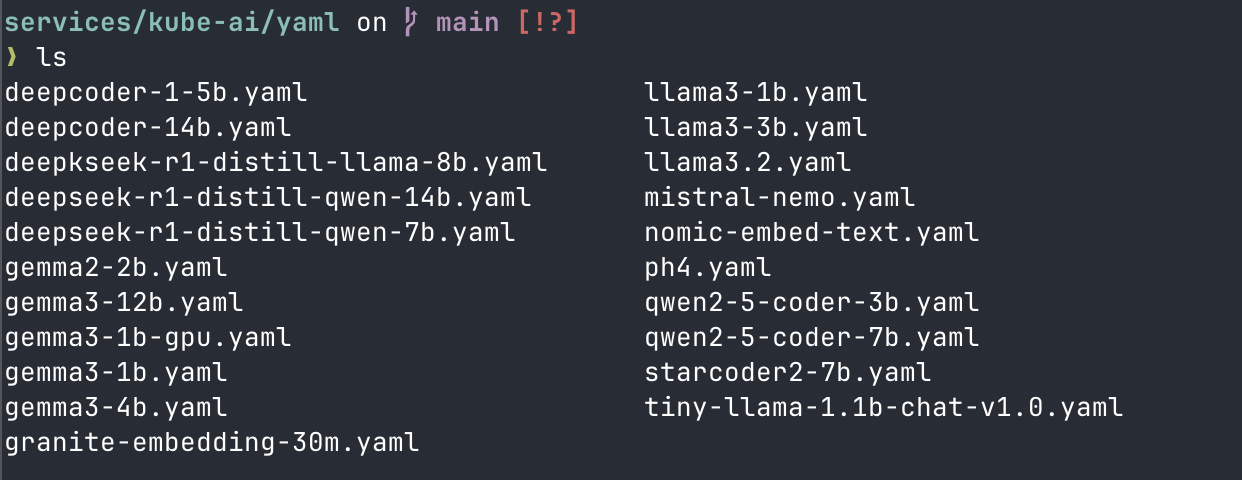
Not all models are completed equal, and a newer model with more parameters might not always live up to your expectations (cough cough qwen2.5-14B). You'll need to test each one out for your use cases to determine if they are a good fit for your work. I've tried out quite a few to figure out how they work with my hardware.
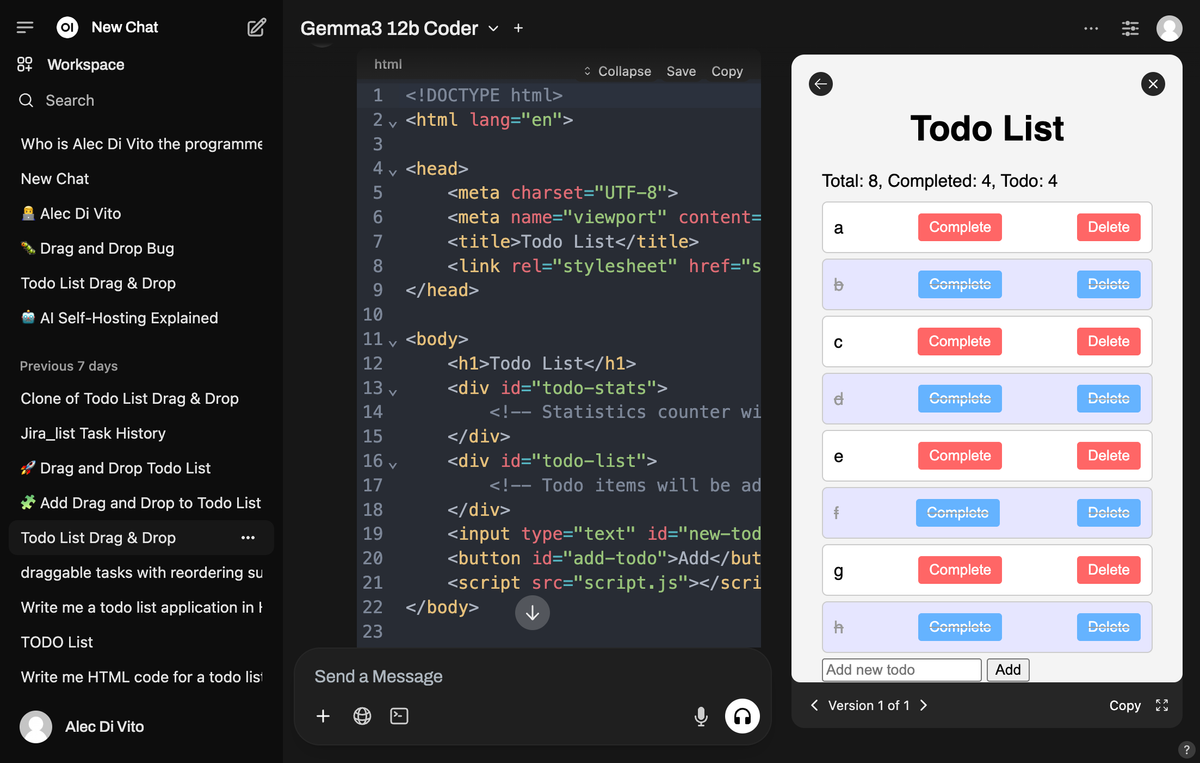
From the models I've deployed, I've really liked the performance of llama3 type models and gemma3. I found when trying to code a simple todo application, gemma3 models performed better. But none of the models could figure out drag and drop sadly 😦. Kube-AI makes testing out many modules a breeze.
Open Web UI
For when you want to use ChatGPT UI but would rather pay your power bill then a billion dollar corporation

The problem with Kube-AI is that the OpenAI API interface to access models uses an unauthenticated HTTP connection. However, Kube-AI recommends running Open Web UI in front of it to add authentication and a nice web UI so that normal people like family and business folks can use it. Users can select from models stored in Kube-AI and chat with them like they are used to with other providers like ChatGPT and Gemini.
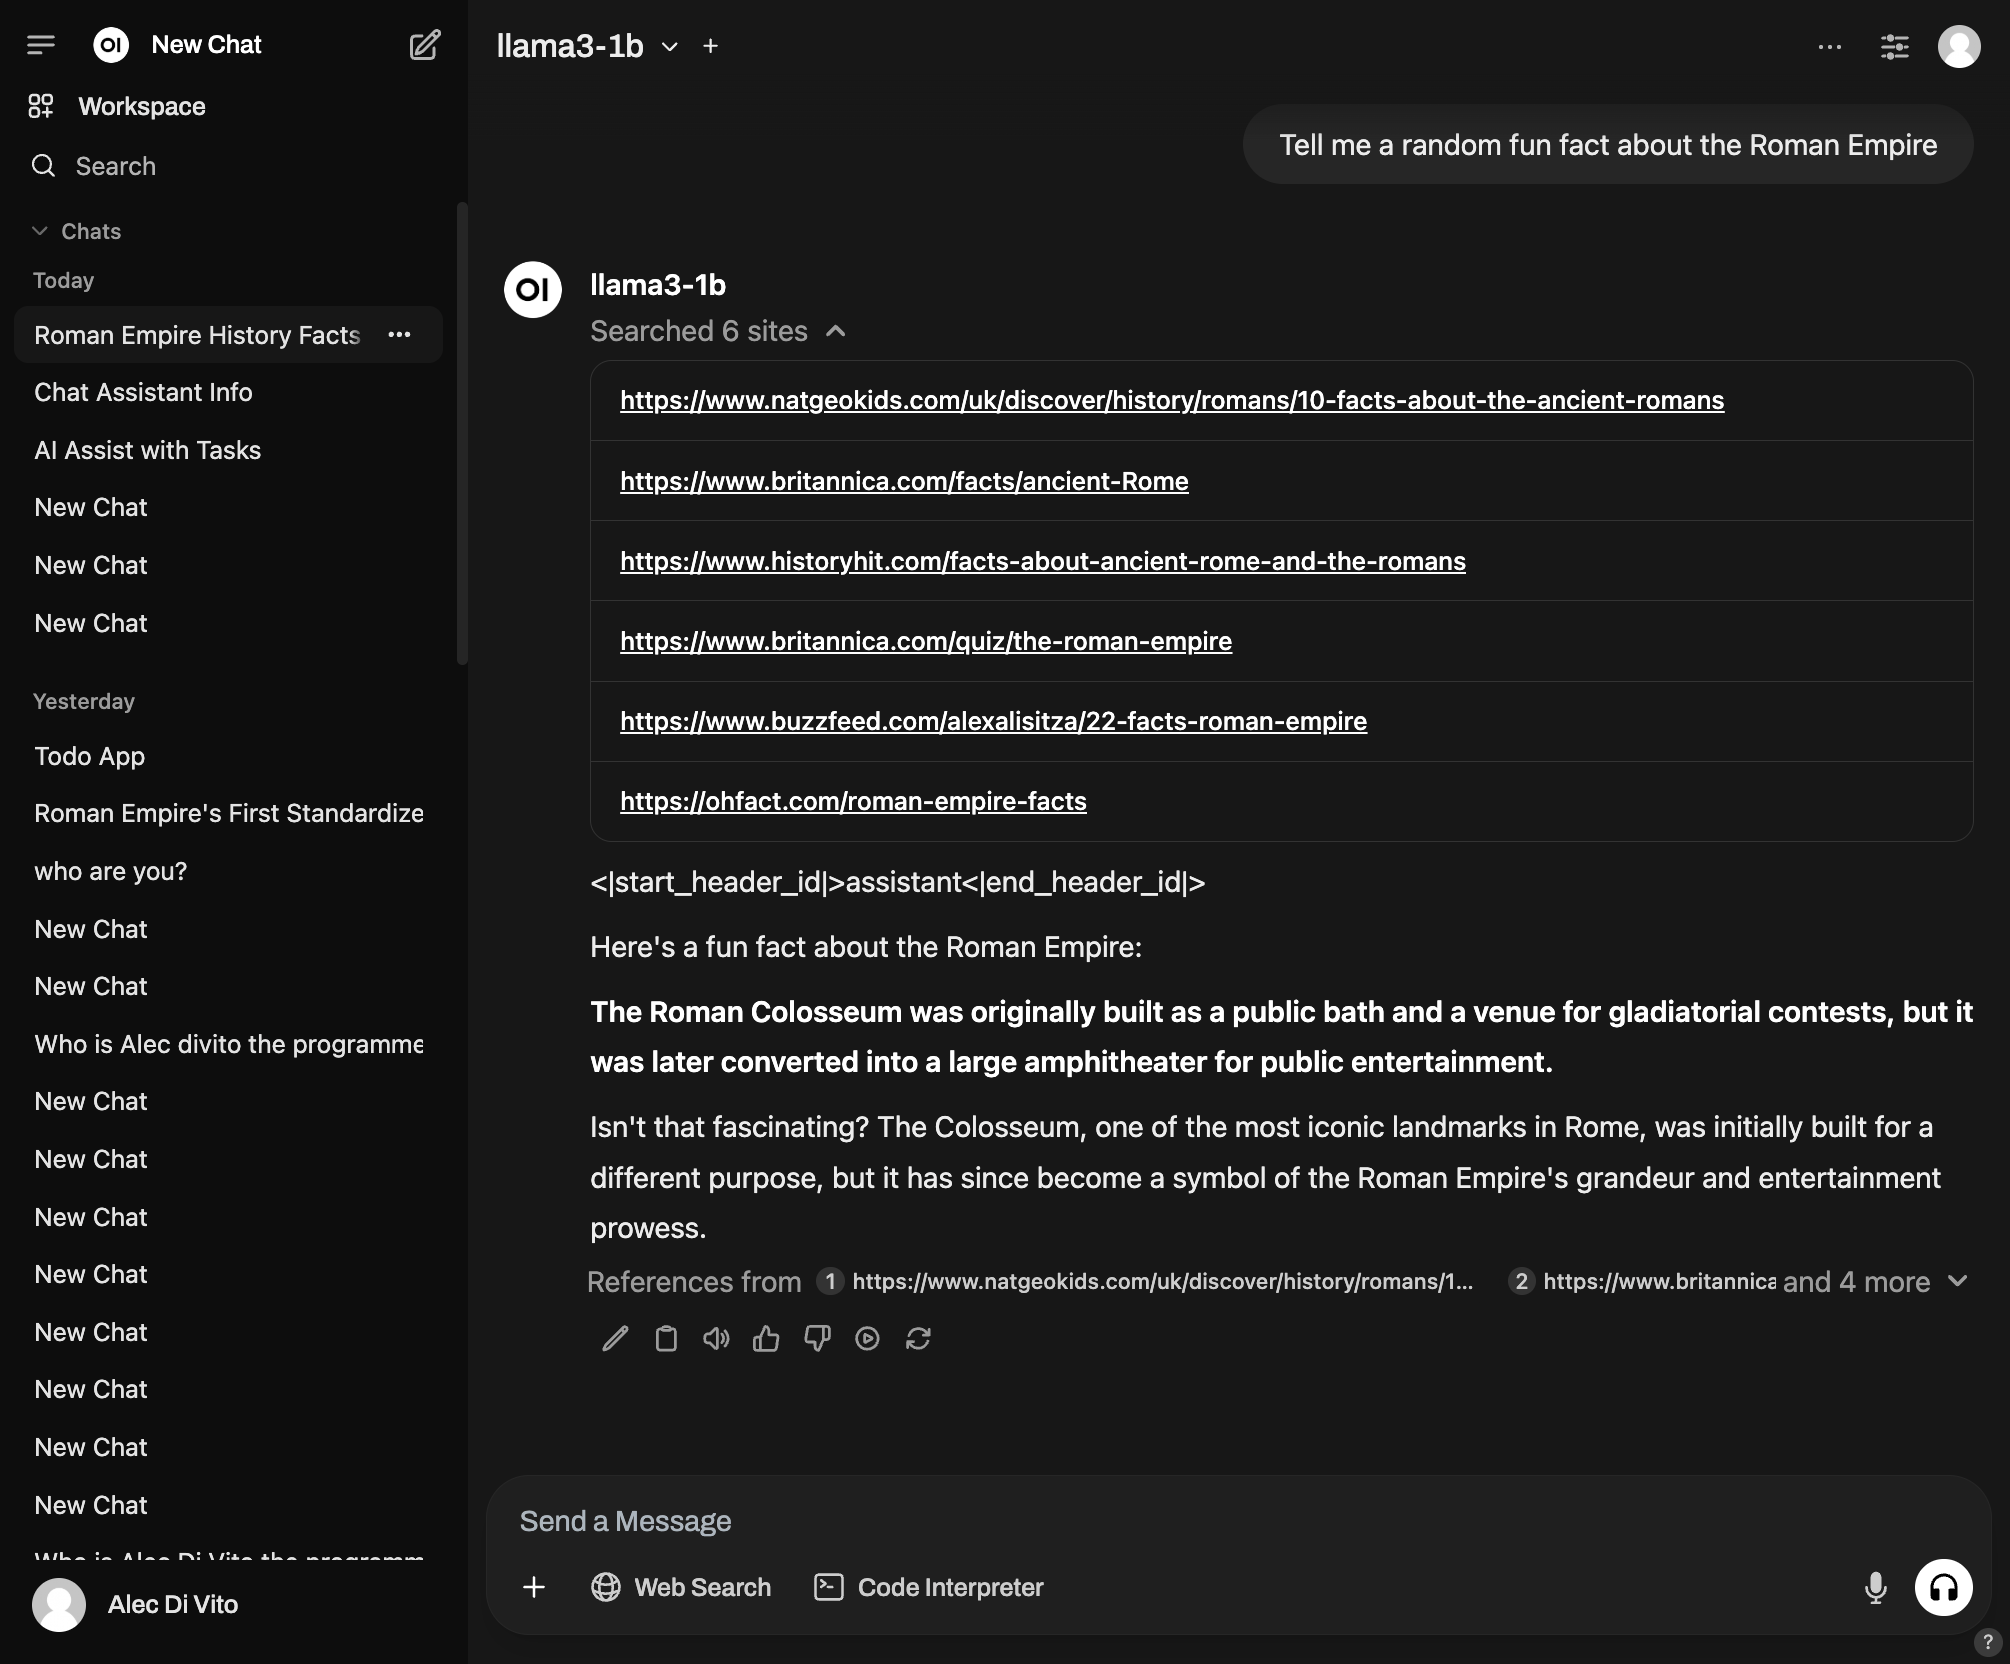
It has many features, some of which I still haven't made use of. One that I use sometimes is the web search feature, which will use a search engine to find some links and build up a small rag database that it will use to answer your query. However, I found that the performance of the web search can be hit or miss.
They also have a web platform where people share their automation for completing different tasks. For example, ChatGPT has the idea of canvas, where when HTML, CSS and Javascript is produced, it can render that in the chat that you are currently in. In Open Web UI, you can download ArtifactV3, which will show you a preview of the generated code in your chat window.
More add-ons created by the community exists. The downside is that the add-ons run on the Open Web UI server, so all code that you add to your server should be read to confirm it's not doing anything wrong that would compromise your server.
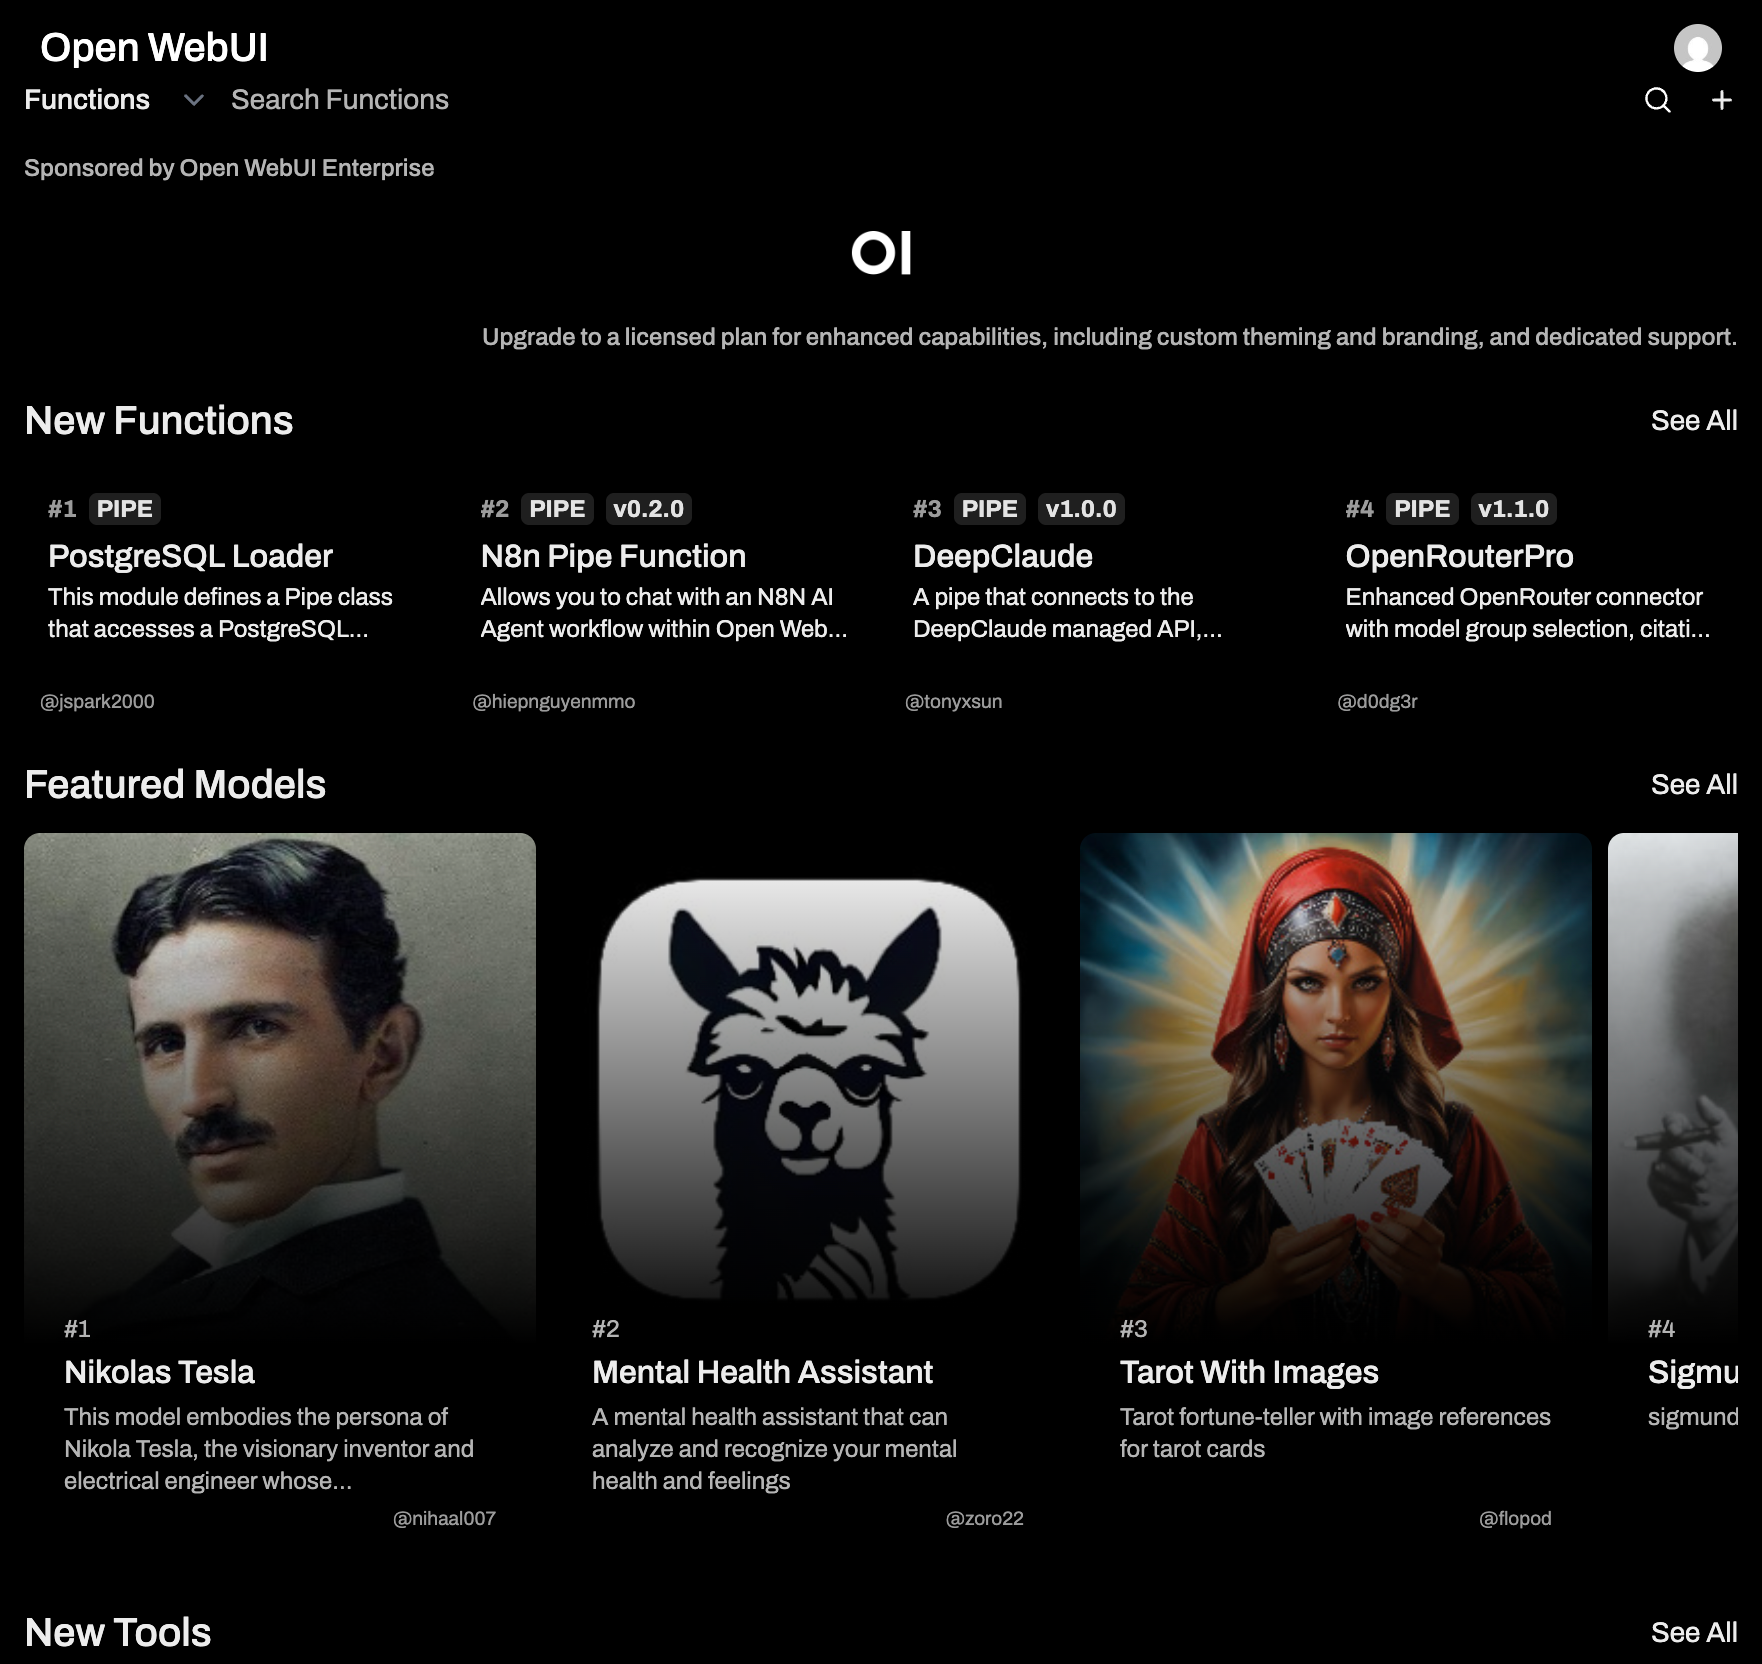
You can explore some of the other functions below. It can provide cool functionality like getting the current time or the weather for a given location, basically extending what the model is capable of doing (sort of like Anthropic's MCP).
A list of functions that are available to add to your instance of open web ui
Aside from chat, you can also configure Open Web UI to create users when they login through a SSO. For example, I have it configured that when someone logins in through Kanidm onto my server, a user is created. I had an issue where as a user they wouldn't be able to see any of the models though, so I made them all admin.
I'll need to review that later 😅 Luckily I don't have users that care all that much.

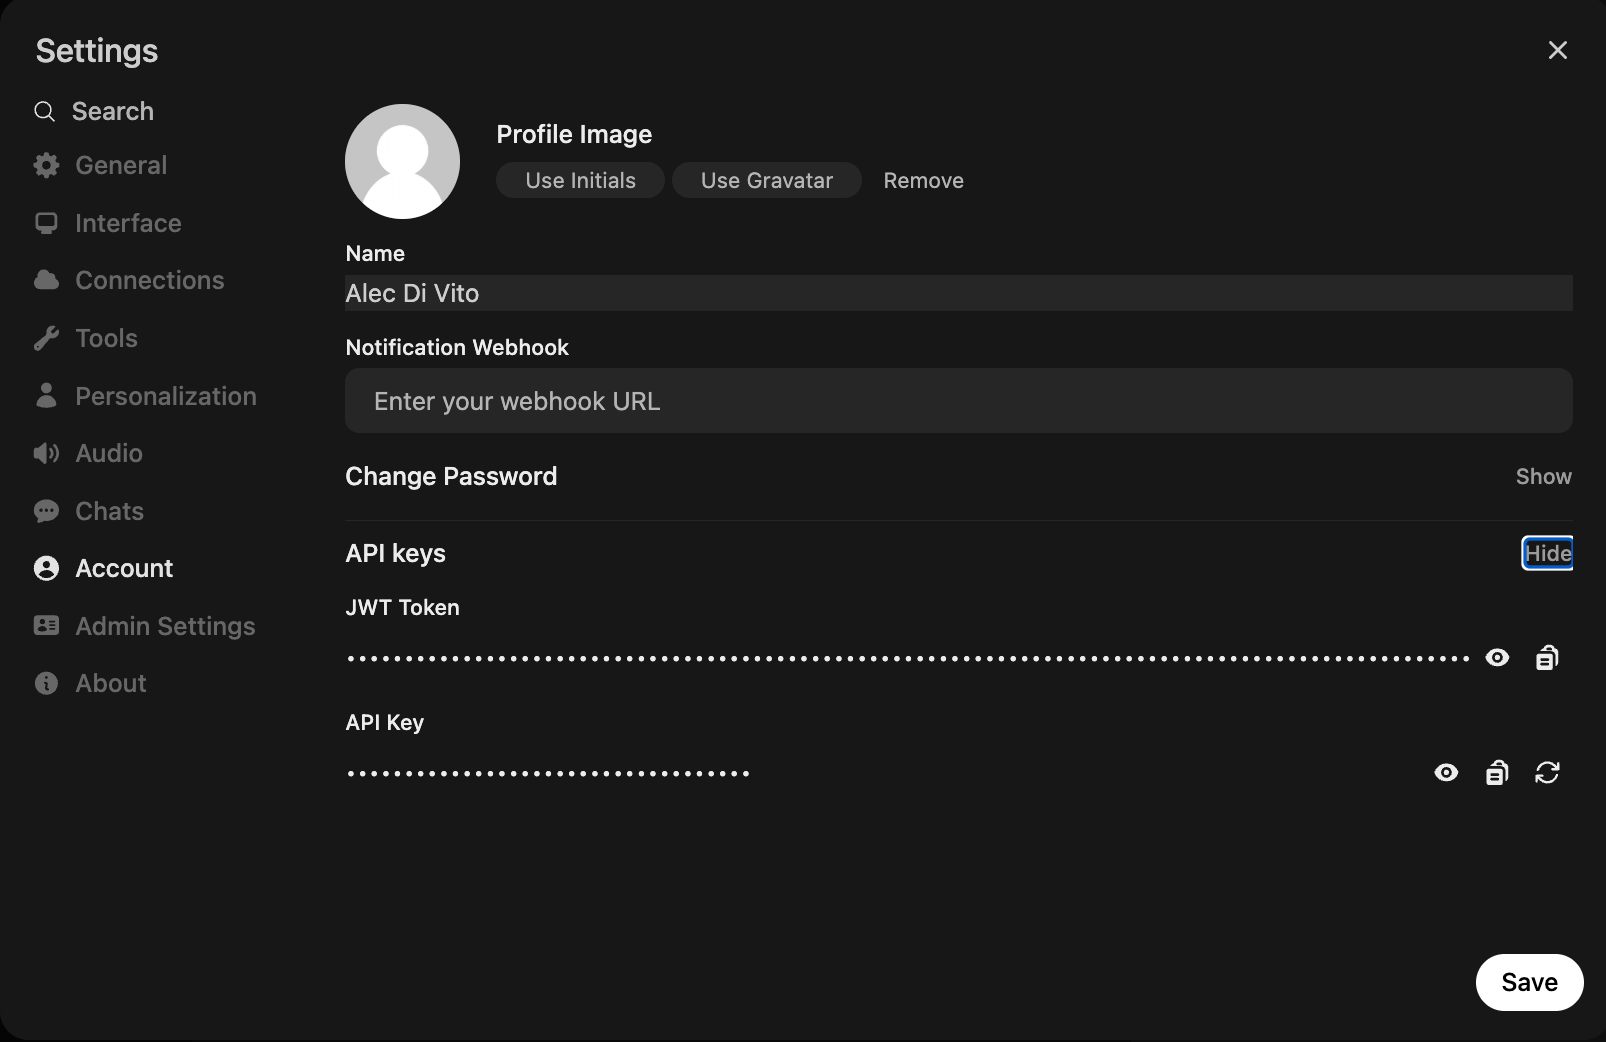
You can also then create API tokens which can be used for developing applications. I did this when I was researching how I could create my own RAG database and so instead of hosting a locally running LLM, I instead targeted my server.
One feature I've heard about that might be useful for business is the fact that you let your users create API tokens that are tied to them, then configure your instance to use something like OpenRouter to provide everyone with access to models such as Claude 3.7 sonnet and other pay for models. Then you use a function (open web ui term) to limit the amount of use of a given model. By using these add ons, we can provide a similar experience to cursor where you only have some access to premium models, up until a point, where then requests will be denied and users will need to use the self hosted models which aren't going to be as good.
Running Open Web UI
You create the YAML for Open Web UI through the helm chart provided by Kube-AI described in the last section. Though Kube-AI just uses the normal open web ui Helm chart as a sub chart.
The hardest part of configuring Open Web UI is the fact that there are many integrations that you might want to consider. I believe they have over 100+ environment variables which all enable certain features. For example, for my configuration, I set 48 environment variables.
The below is a simple example of a configuration that you can use. Key attention should be on the fact that we don't want to enable Ollama in Open Web UI because all of our AI functionality should come from Kube-AI OpenAI API interface instead.
open-webui:
  enabled: true
  ollama:
    enabled: false
  pipelines:
    enabled: false
  websocket:
    enabled: true
    manager: redis
    url: redis://redis:6379/1
    redis:
      enabled: false
  redis-cluster:
    enabled: false
  openaiBaseApiUrl: "http://kubeai/openai/v1"
  service:
    type: ClusterIP
    port: 8080
  fullnameOverride: "openwebui"
  ingress:
    enabled: false
  persistence:
    enabled: false
  autoscaling:
    enabled: false
  extraEnvVars:
    - name: MAIN_LOG_LEVEL
      value: "10"
    - name: PORT
      value: "8080"
    - name: DATABASE_URL
      valueFrom:
        secretKeyRef:
          name: open-webui-db-app
          key: uri
    - name: WEBUI_AUTH
      value: "true"
    - name: WEBUI_NAME
      value: "Open WebUI"
    - name: AIOHTTP_CLIENT_TIMEOUT
      value: "50000"
    - name: ENABLE_OLLAMA_API
      value: "false"
    - name: ENABLE_OPENAI_API
      value: "true"
    - name: OPENAI_API_KEY
      value: "not-defined"
    - name: RAG_EMBEDDING_ENGINE
      value: openai
    - name: RAG_EMBEDDING_MODEL
      value: "nomic-embed-text"
    - name: RAG_OPENAI_API_BASE_URL
      value: http://kubeai/openai/v1
    - name: RAG_OPENAI_API_KEY
      value: not-defined
AIOHTTP_CLIENT_TIMEOUT and set it to something high, otherwise you might find that if your AI responses take longer then 5 minutes, it will stop the response from being written to the web page.Once the configuration is up and running, you can start testing out AI models!
AI Models
Tips and tricks for getting AI models running on Kube-AI
Getting AI models to run can be very tricky. I've found the most user friendly experience is to stick with Ollama models for as much time as possible as they have many configurations out of the box which allow you to not think too much about configuration. It's also great for users that only have access to a CPU so running larger models is easier, albeit, a bit slow.
One key piece of information for running Ollama models is understanding that by default, all context length are set to a default of 2048, which is nothing. I recommend changing the context length configuration using the environment variable OLLAMA_CONTEXT_LENGTH. Pick the biggest number that the model supports that your computer can run.
When using a GPU and running models with vLLM, remember to include chat templates, there are many examples to choose from for your given model. Depending on the model you choose, you might find that running it on your GPU isn't possible but you can extend the amount of memory the GPU has access to by using the --cpu-offload-gb=<number> command so that the model also uses RAM. However, in my experience, this resulted in a very poor experience, so unless you have a high bandwidth to the CPU memory, I wouldn't recommend it. Also be sure to configure the designed context length using the --max_model_len=<number> command.
In Conclusion
Ultimately, this journey has demonstrated the power and versatility of Kube-AI with Open Web UI. While deploying and configuring these tools – especially when dealing with the nuances of GPU memory and context lengths – presented several challenges, the reward is a powerful, self-hosted AI environment.
This article highlights the potential for individuals to directly engage with and experiment with AI models, and with the right configurations, open up opportunities for sharing and collaboration using self hosted infrastructure. I believe that Kube-AI with Open Web UI, combined with tools like Ollama and vLLM, represents a significant step towards making access to AI technology easier and less expensive.